Projector warping: geometric correction that survives the show
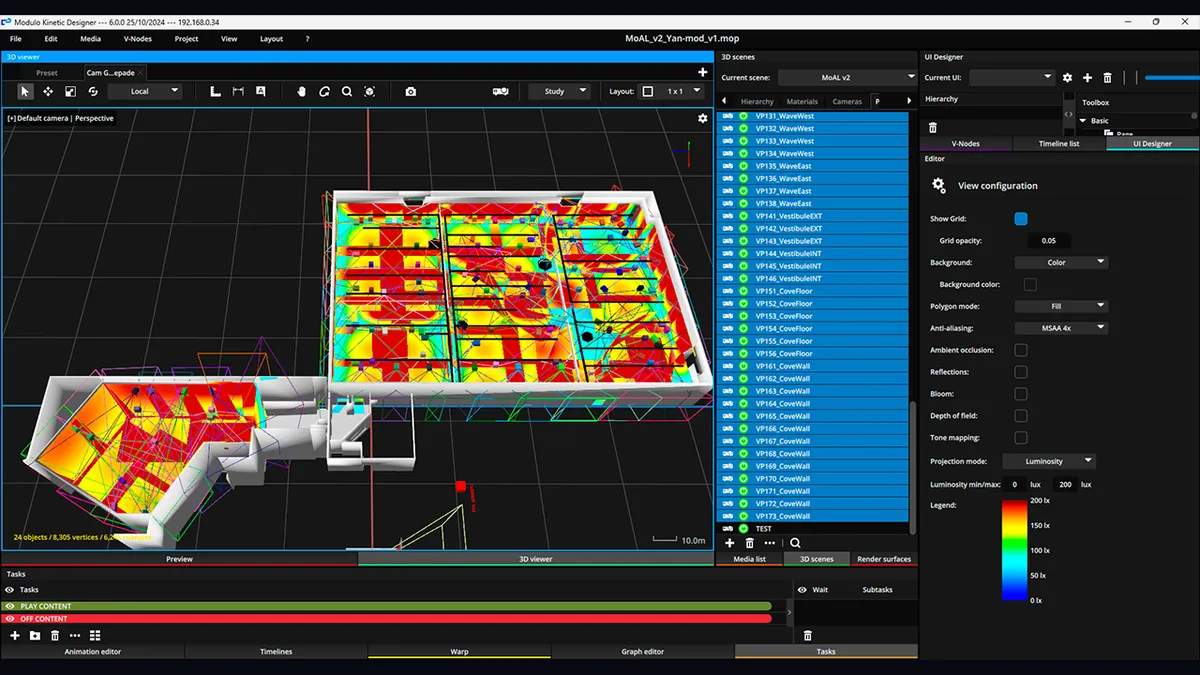
Projector warping is the digital step that bends the image to fit the surface. Also called geometric correction, it takes a rectangular signal and reshapes it so straight lines land straight on a curved wall, a dome, or a sculpted facade. It is the fourth step of projector calibration, and the one people reach for too early, too hard, and for the wrong reasons.
I have warped images on the Arc de Triomphe (15 Barco units on the 2020 edition) and across the Museum of Art and Light in Kansas, 108 projectors on 3,400 m². A complex facade still takes me two to three nights to warp by hand. That is the honest number. So before you push a single control point, it is worth knowing what warping is actually for, and what it is not.
Warping resamples pixels. It moves them around inside the panel so the projected geometry matches a non-flat or off-axis surface. Three legitimate jobs:
That last one is the order that matters: geometry first, blend second. Warp two misaligned images and the edge blending curve will average them into a blurry doubled band no tuning can save.
Here is the part most guides skip. Warping is a last resort, not a first fix. Every pixel you warp is a pixel you stretch, and every correction you stack eats sharpness, contrast, or brightness. So there is a list of problems you do not solve with warp, ever:
The rule I repeat on site: the less you deform, the more image survives. A perfect warp on a well-placed projector is a light touch. A heavy warp is usually paying for a mistake made earlier with a measuring tape.
Two families of warp, and knowing which one you are in saves hours.
Parametric warp computes the deformation from a model. Corner pinning is the simplest case: you set the four corners and the software derives the rest with a homography. Extend the same idea with a mathematical model of a curved surface (a quadric, for a cylinder or a sphere) and you get a clean, predictable warp with very few handles. Fast, stable, easy to redo. It works when the surface actually matches the model.
Mesh warp gives you a grid of control points you push individually. A 2x2 grid is corner pinning. Subdivide to 4x4, 8x8, and beyond, and you can chase geometry that no equation describes: a sculpted relief, an irregular facade, a prop. Commercial-grade projectors ship warp engines supporting dense mesh grids, up to 128x128 on some hardware. Flexible, and slow, and fragile: the denser the mesh, the more handles you have to maintain when a projector gets bumped in month three.
Rule of thumb: parametric for anything a shape describes, mesh only for what it cannot.
The surface decides how hard warping is going to be, more than the projector count.
Same three places as blending, same trade-offs.
In the media server. My default on real projects. Full control over the mesh, adjustable live during the show, no extra hardware. On my own large installations the warp lives in Modulo Player or Modulo Kinetic; across 250+ Modulo servers deployed I have never needed an external warp box. MadMapper and Resolume handle it well on small and mid setups. Cost: GPU headroom when the mesh gets dense.
In the projector firmware. Most professional projectors embed a warp engine (Christie Twist, Barco, Epson, Panasonic). Independent from the server, latency-free, fine for a fixed permanent geometry. Christie documents its warp and blend tools if you want the vendor view. Painful to tune through on-screen menus once the surface gets complex.
In a dedicated processor. External warp-and-blend hardware for large or broadcast-grade systems. Reliable, expensive, one more box in the chain. Scalable Display's guide to warping, blending and calibration covers the camera-based processor angle well. I reserve it for projects that genuinely need it, which is not many.
One rule across all three: warp where you blend and where your show runs. Warping in the projector, then blending in the server, means two systems disagreeing about geometry at 2 a.m. One system, one truth.
The mistake I see most on mesh warps is starting dense. Someone drops a 16x16 grid on a gentle curve and spends the night fighting 256 points that all want to move.
The method is the opposite. Start coarse, refine progressively:
An over-dense mesh does not just waste time. It introduces its own micro-wobble, ripples between control points that were not in the surface, and it becomes impossible to touch up cleanly later. Fewer points, placed well, beat a cloud of points fighting each other.
Verify at every level with the right image. Grids for straight lines, not content. Content hides a bowed line; a single-pixel grid makes it obvious. The patterns are free in my test pattern generator, exportable at your exact output resolution.
A warp you cannot reload is a warp you will redo. On permanent installs, temperature cycles and air currents move projectors a few pixels over weeks, enough to break a mesh. When a unit drifts, you want to restore a saved file and fine-tune, not rebuild from zero at midnight.
If your install cannot survive your vacation, it is not finished.
Being honest about scope saves everyone a night:
Where warping pays for itself: any real geometry, any dome, any blend, any client who will walk up to the wall and look. For the eleven other ways a calibration goes wrong, I collected them in the calibration mistakes that ruin mapping projects.
If you have a surface, a projector, and a doubt about how much you will have to warp, the honest answer is usually visible before you rent anything. Write me. I have pushed enough control points at 2 a.m. to tell you which nights are avoidable.
Cookies and privacy Learn more
This site uses cookies to measure audience and improve your experience. You can accept, reject or customize your preferences at any time. Learn more