From 3D Scan to Media Server: The Whole Chain
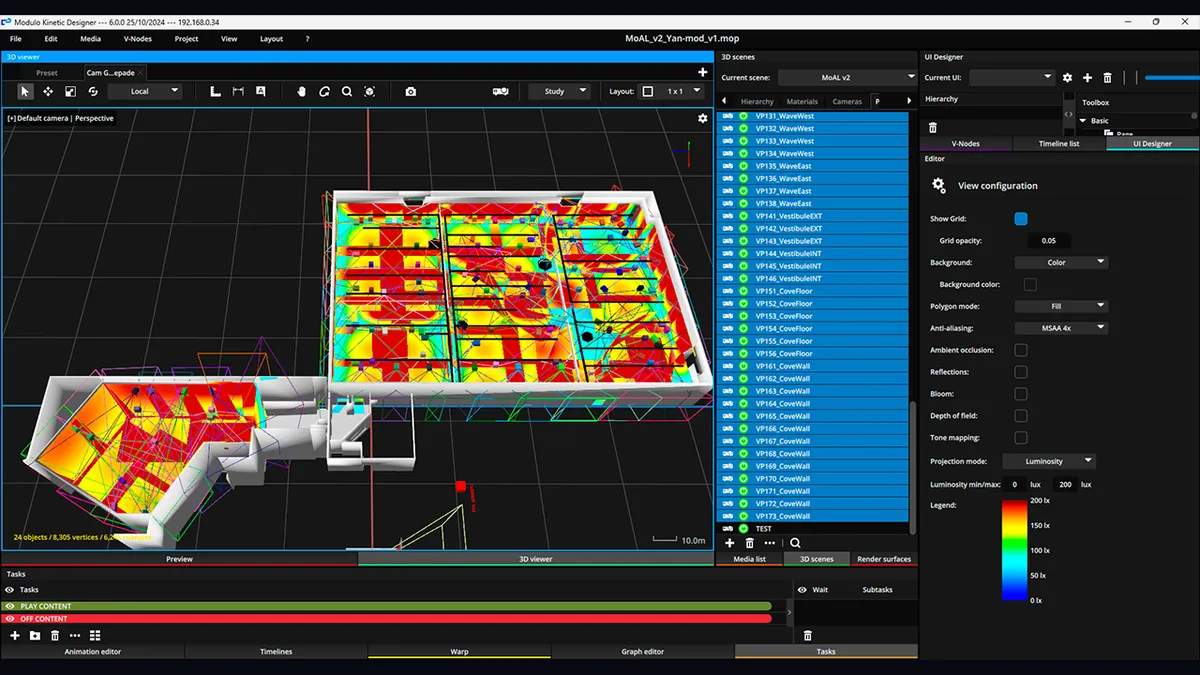
The 3D model that comes out of a scan and the 3D model a media server will run in real time are rarely the same file. Between the two sits a chain: point cloud, retopologised mesh, UV unwrap, export in the right format, import, then aligning the virtual model to the real object. This guide walks that chain end to end, in the order I actually run it, and points at the exact spots where it breaks.
I have been calibrating shows on Modulo media servers for fifteen years, and training on them since 2017 (certified Modulo Pi trainer, 250+ servers deployed). The scan-to-server handoff is the link nobody documents. Tutorials stop at the mesh export. And the export-to-first-warp gap is exactly where the sleepless nights hide.
A real object to map, a server that has to project onto it pixel-accurate. Here are the steps, none of them skippable:
Steps 1 to 4 are studio work. From step 5 on, any mistake gets paid on site, at night, with the truck already half loaded. That is why the export step deserves more care than it usually gets.
Three traps, always the same ones, whenever a model crosses between two applications.
Scale. Blender thinks in metres, a scan can come out in centimetres or arbitrary units, and an FBX does not always carry the unit cleanly. The classic result: the model lands in the server a hundred times too big or too small. Check the scale against a known dimension before you export. If your object is 4 metres tall in real life, it should read 4 units in the server, not 400.
Orientation. Every application has its own up axis. Blender works Z-up, most real-time engines and servers expect Y-up. An FBX exported without axis conversion arrives lying on its side. Two clicks to fix when you know where to look, one lost hour when you do not.
Pivot. The model origin is the point it rotates around and positions by in the server scene. Leave the pivot wherever the scan software dropped it, and your model lands ten metres off, or spins around a corner. Put the pivot on a physical landmark you can find again on the real object: a corner, an edge, the base on the ground.
On the format itself, the FBX-versus-OBJ debate is simpler than it looks. Your reconstruction software usually offers a long list: RealityScan exports in about fifteen formats, including OBJ, FBX and GLB (RealityScan, Model Export, retrieved 2026-07-09). Keep only the one your server reads. OBJ is static, universal, no animation: perfect for a fixed object to map. FBX carries more (hierarchy, animation, pivots) but also carries more ways to break. I go OBJ when the model does not move, FBX when I need the hierarchy or animated objects.
On the server side the list of accepted formats is short, and that is on purpose. Pixera, for one, spells out that it only reads GLTF, FBX and OBJ (Pixera, Models, retrieved 2026-07-09). Modulo Kinetic, the media server my larger projects run on, imports the 3D model straight into its scene and lets you project onto it with a full render pipeline. What every serious server shares: it wants a clean mesh, not the triangle soup a raw scan spits out.
Once the file is in, the real question stops being technical and turns geometric: make the server model coincide with the object standing in front of you.
This is the heart of the job, and no clean export does it for you. The server shows your 3D model. The projector lights a real object in space. Until the two coincide to the pixel, the image slides off the edges.
My on-site method:
A well-retopologised, well-exported model makes this step fast. A dirty model makes it impossible: you spend the night fighting a geometry that matches nothing you can measure.
A raw scan is millions of polygons. A media server has to hold 60 frames per second while projecting onto it, often across several outputs at once. The two do not mix.
An over-dense mesh drops the framerate, saturates the graphics card memory, and makes alignment stutter to the point of being imprecise. The answer is not a bigger machine. The answer is upstream: a mesh retopologised to a few tens of thousands of well-placed polygons renders better, and faster, than a two-million-triangle scan. It is all in the retopology guide. Skip that step to save time and you will repay it on site, with interest.
This whole chain can be tested before the first projector is rented. Drop the scanned model into a 3D scene, place the projectors, check coverage and overlaps, confirm the object is mappable from the planned rigging positions: that is exactly what I built Lumeo for. The scanned model imports into it, and the study shares by link before a single machine moves.
The scan-to-server workflow costs time. It is not always worth it.
Once the model is imported and roughly aligned, everything left (fine warp, blend, colour, uniformity) is calibration proper. The full method starts from the projector calibration guide.
And if you are standing in front of a scanned object, an FBX that refuses to line up and a show in three days, it is usually the scale or the pivot. Check those two first. If the doubt survives, write me: I have made most of these mistakes, often twice.
Cookies and privacy Learn more
This site uses cookies to measure audience and improve your experience. You can accept, reject or customize your preferences at any time. Learn more