Projector autocalibration: 2D and 3D, from the field
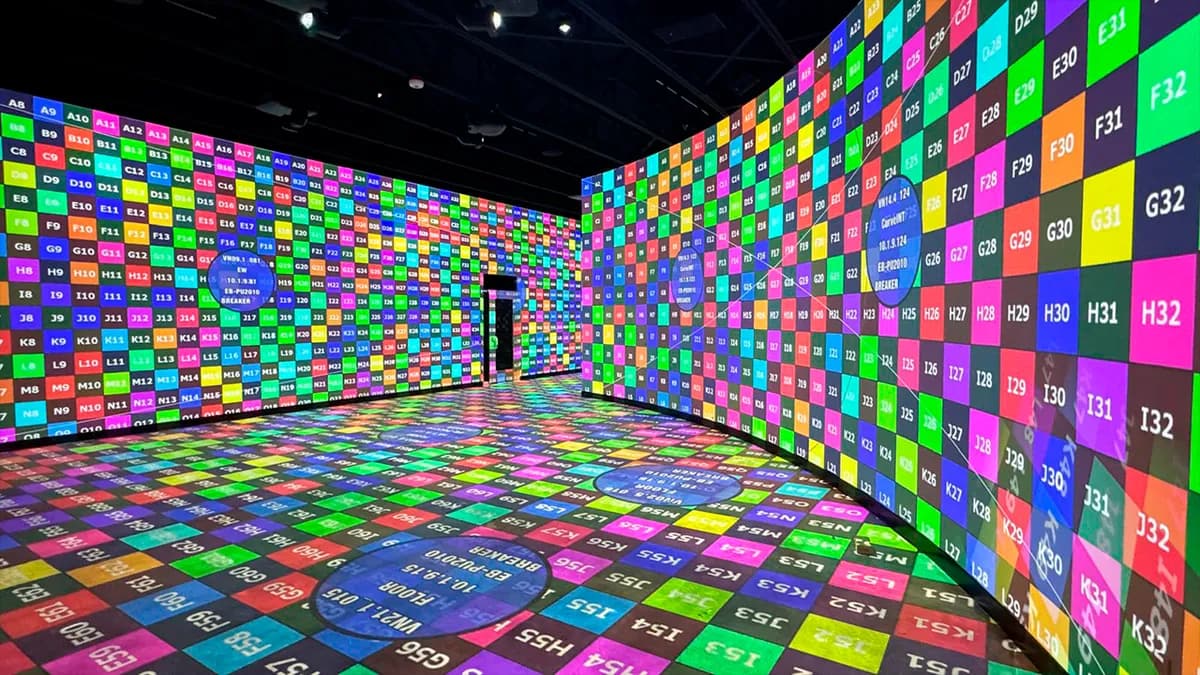
Autocalibration is camera-based calibration. A camera watches the projected surface, the system displays structured patterns, and the software computes the warp and the blend for each projector on its own. What takes me two to three nights by hand on a complex façade can drop to minutes. When the surface cooperates. That last clause is the whole subject.
I have run this on both ends of the scale: single-camera 2D on domes, full 3D on architecture. I am a certified Modulo Pi trainer and I have deployed the workflow across 250+ Modulo servers, so most of my field references here are Modulo Player and Modulo Kinetic. The method is not specific to them. Camera-based calibration exists in most professional media servers and in dedicated systems. What follows is where it earns its licence fee and where it quietly wastes your evening. This page sits under the projector calibration method; read that first if you want the full order of operations.
The principle is the same on every system. Each projector displays a series of structured light patterns, coded grids and gradients the camera can decode pixel by pixel. The camera captures them. The software matches captured pixels to surface positions, builds a model of what it sees, and solves the geometry: warp per projector so straight lines stay straight, blend curves in the overlaps so the seams vanish, sometimes brightness and color matching on top.
It is the same idea as projecting a test pattern and adjusting by eye, except the camera is the eye and the solver does the adjusting. The math behind it is well-established computer vision. The hard part was never the algorithm. It is the capture conditions, and that is where projects succeed or fail.
The simple case, and the one I reach for most. A single PoE camera observes the projected zone. The system projects its patterns, reads them back, and calibrates warp and blend for every projector in the group in a few minutes. In Modulo Player this is capped at 6 outputs per server; Modulo Kinetic removes the limit.
Where 2D shines is any surface the camera can see whole and flat enough to read as a continuous plane:
The limit is physical, not software. 2D autocalibration fails the moment the surface has real relief: a façade with cornices, recessed windows, sculpted detail. The camera sees a flat projection of a 3D object and the solver has no way to recover the depth. It also fails when ambient light drowns the patterns, or when no single camera position can see the entire projected area. In those cases you go back to manual warping, or you move up to 3D. I cover the 2D case in the wider mapping preparation workflow; this page is the version that also handles relief.
When the surface has geometry, autocalibration needs to understand that geometry. 3D autocalibration feeds the system an accurate 3D model of the object, produced upstream by scanning or photogrammetry, and uses cameras paired with each projector to reconstruct where every projector actually sits and points. From that, it computes warp and blend on surfaces no single-camera 2D pass can touch: sculpted façades, volumetric objects, anything with depth the camera has to resolve.
Modulo Pi ships this built into Kinetic. They showed it at ISE 2025 driving a 3D model of the Arc de Triomphe with PoE cameras and projectors, computing the blend and warp on the relief automatically (Modulo Pi's ISE 2025 3D autocalibration showcase). This is the tool for a case that used to mean two or three nights of manual work, and it is the reason I stopped telling clients that a sculpted multi-projector setup always costs multiple calibration nights. Sometimes it does not anymore.
The catch: 3D autocalibration only works if your 3D model matches the real object. A model that is 20 cm off will calibrate confidently to the wrong surface. Garbage in, precise garbage out.
Autocalibration is not always faster, and it is never smarter than your placement. Honest split:
Auto wins on smooth continuous surfaces, on recurring shows recalibrated every run, on high projector counts where manual alignment stops scaling, and anywhere the surface is stable and the camera has a clean view. On a planetarium dome it is not close.
Manual wins on a single projector on a flat wall (setting up the camera takes longer than the warp), on surfaces the camera cannot fully see, under uncontrolled ambient light, and on one-off jobs where the calibration is quick and the rig moves once and never again. A trained eye on a grid still beats a badly positioned camera.
And autocalibration fixes exactly none of your upstream mistakes. A projector 40 cm off its planned position, autocalibrated, is a badly placed projector with excellent warping. The camera corrects the image, not the plan. Every physical-placement error from step one of the calibration method survives untouched.
The marketing says one click. The invoice says otherwise. Autocalibration is licensed, usually per output or per group, often through a dongle. On a large install that per-output line adds up, and it is a number worth putting in the budget before you promise the client a two-hour calibration.
Then there is the rig itself. PoE cameras, mounts, cabling, and camera positions with clean sightlines to the whole surface. On a permanent venue that camera infrastructure lives on site for the life of the install. On a touring show it is one more flight case and one more thing to align. None of this is a reason to skip autocalibration. It is a reason to price it honestly.
Where it pays back fast: recurring shows and permanent installations. Every maintenance recalibration that used to be a manual evening becomes a few minutes. On a venue recalibrated monthly, the licence pays for itself inside a season.
This is the argument I make most often. A permanent install does not hold its calibration. Day-night temperature cycles, metal structure expansion, air currents, the occasional bump from a cleaning crew, all of it moves projectors by a few pixels. Enough to open a blend seam. On the venues I look after I check geometry every two to three months, and camera-based recalibration is what makes that check a routine instead of a night shift. The camera stays mounted, you trigger the pass, you verify, you go home.
A trained eye still decides whether the result is good. The camera measures. It does not have taste.
Where I tell people to leave it off:
For the full chain around autocalibration, warping, blending and color, start from the projector calibration guide. To go deeper on the vendor side, Scalable Display's automatic projector mapping overview is a clear read on the camera-based workflow.
If you have a dome, a façade, or a permanent install and a doubt about whether autocalibration is worth the licence, that is exactly the kind of call I take. I have made it wrong once or twice, which is how I know.
Cookies and privacy Learn more
This site uses cookies to measure audience and improve your experience. You can accept, reject or customize your preferences at any time. Learn more