Getting started Lumeo
Lumeo helps you plan a projection or LED wall project in 3D, then export a technical dossier. Here is the essentials in 6 steps. Plan about ten minutes for your first scene.
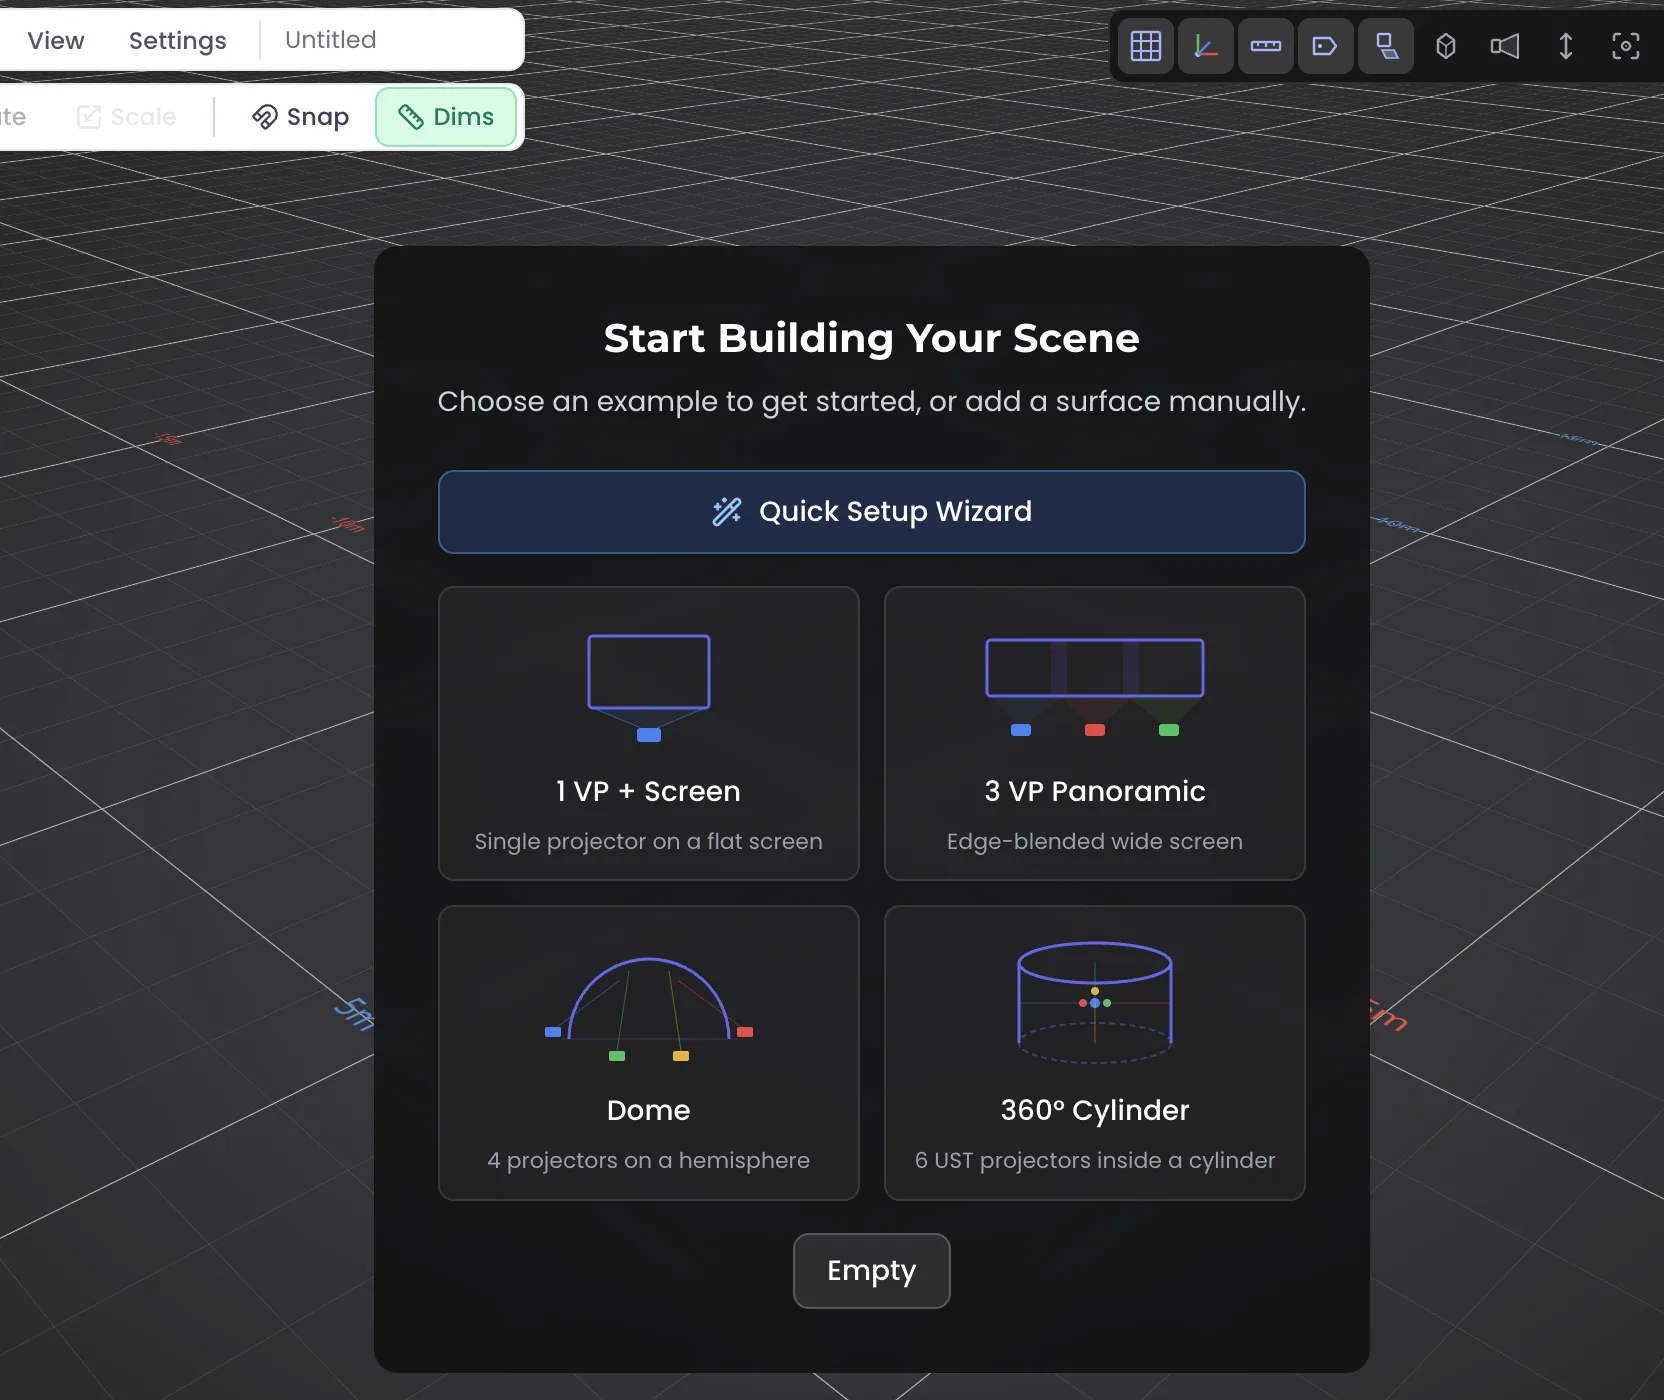
Step 1Create a scene
On opening, the ProjectHub lists your projects. Start an empty scene to enter the 3D viewport.
- Click “New project” (or Quick Setup) and give it a name.
- The 3D viewport opens, ready to receive objects.
- Everything is saved to the cloud (Save button), with version history.
Step 2Add a projector (VP)
The projector (VP, virtual projector) is the heart of Lumeo. Add it, pick a model, then aim it.
- Add menu, then Projector.
- Pick a brand and model from the built-in database, or set the optics by hand (throw ratio, lumens, resolution).
- Move and aim the VP with the gizmo; the projection cone and distance update in real time.

Step 3Surface and projection
Add a surface (wall, screen, cube, floor) to catch the projection, then load an image or test pattern to preview the result.
- Add menu, then Surface; place it facing the VP.
- Load an image (pattern) or a test pattern onto the surface.
- The projection appears, with blending when several VPs aim at the same area.

Step 4LED walls and LED Compose
Lumeo handles LED walls too. Define a panel grid, then group several screens into a LED Compose to get the layout and a pixel canvas.
- Add menu, then LED Wall; pick the panel and the grid (h x v).
- Totals are computed for you: weight, power, pixels, surface.
- Group several screens into a LED Compose, then export the package: 3D model, pattern PNG, layout map and PSD.

Step 5Import a 3D model
Import the set, stage or building as GLB, OBJ or FBX to project onto it and validate angles in the real context.
- Add menu, then Import model (GLB, OBJ, FBX), with live preview.
- The model becomes a projection surface: VPs compute onto it automatically.
- Hide or show sub-parts to isolate what you care about.

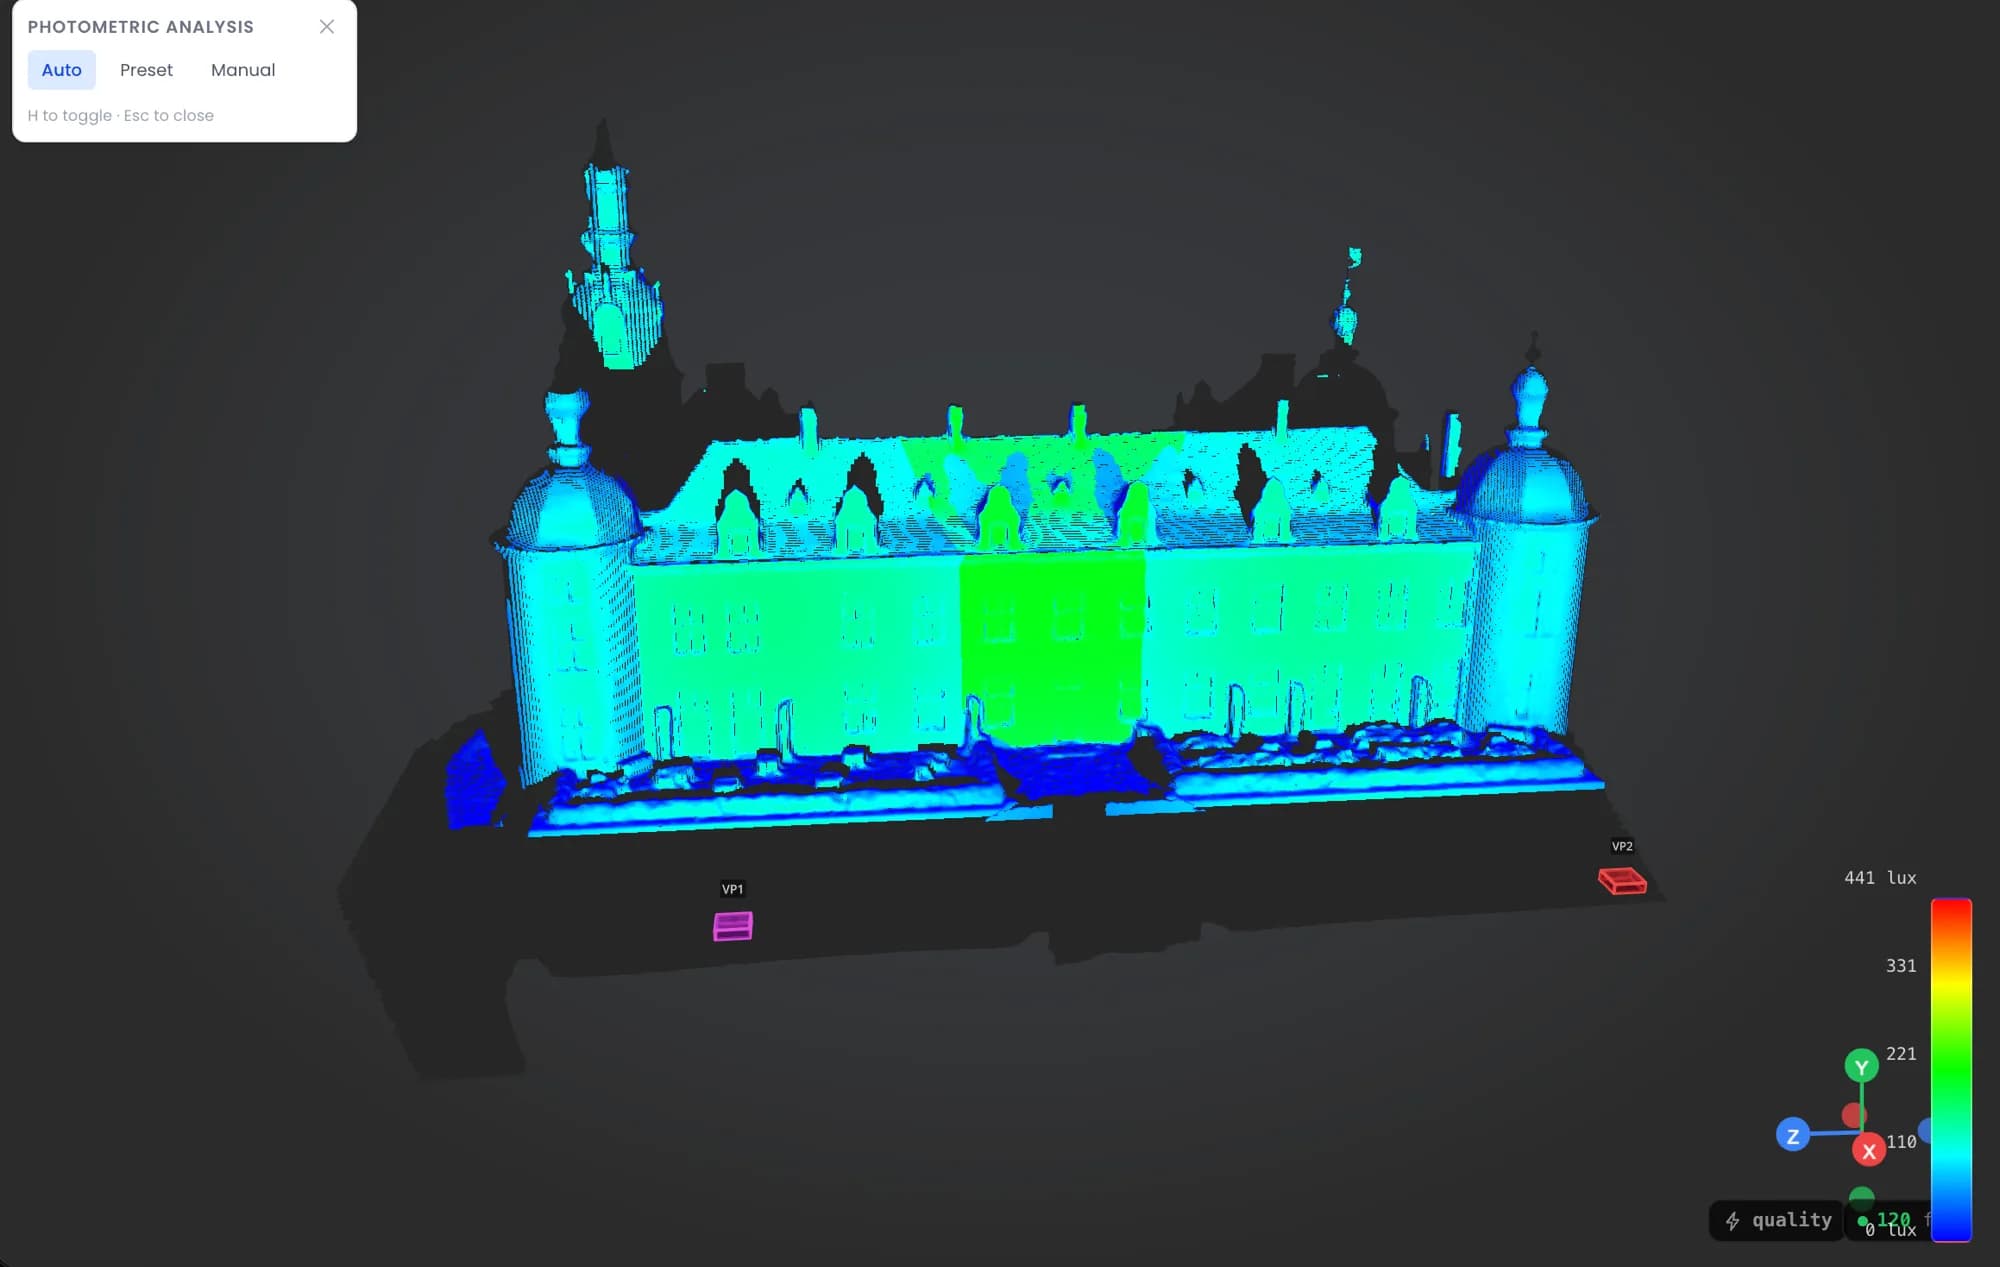
Step 6Analyse and export the dossier
Check coverage and brightness, then export the technical dossier for the client or the crew.
- Analysis mode: photometric heatmap (lux) on the surfaces.
- Measurements, dimensions and 3D annotations to document the plan.
- PDF export (technical dossier), 3D export (GLB, OBJ, FBX), and a read-only client viewer link.
Full, detailed documentation: Lumeo documentation
Cookies and privacy Learn more
Cookies and privacy
This site uses cookies to measure audience and improve your experience. You can accept, reject or customize your preferences at any time. Learn more